 Blacksmithing is one of the six professions in The Elder Scrolls Online, and much like in other games it enables you to craft metal-based armor and weapons. Blacksmithing isn’t just designed to waste your time and resources: you can actually craft some of the best armors and weapons in the game making this tradeskill a very popular one.
Below we’ll take a look at some of the basics of blacksmithing. If you missed it don’t forget to read my guide about crafting basics first which provides an overview of all 6 professions.
Contents:
Blacksmithing Basics
As mentioned blacksmithing enables players to craft various metal weapons and heavy armor (excluding shields, bows, staves, leather and light armor). Anyone can start crafting basic armor without any skill points invested, but the Blacksmithing skill line gives you plenty of reasons to spend skill points in. To be able to craft higher quality items you will need to spend a few skill points, as well as gather or purchase various types of ore. To level up your Blacksmithing skill you will need to obtain “Inspiration”, which is basically experience for crafts.
Materials
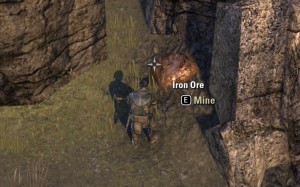
The first blacksmithing resource you come across is Iron Ore. Much like with materials for other professions, you don’t need any proficiency in blacksmithing to gather the ore. Ore is typically fairly easy to come by if you’re consistently mining nodes while leveling. You can also deconstruct existing weapons and armor to obtain some raw materials from them.
Other than the starting Iron Ore, you will later pick up Steel, Orichalc, Dwarven, Ebony, Calcinium, Galatite, Moonstone and Voidstone ore. To be able to use these ores you will need to invest skill points into the blacksmithing skill tree. Before you can use the ore to create items you will need to refine it by finding an anvil anywhere in the world, and on average 10 Iron Ore will yield 8 Iron Ingots.
Blacksmithing Skill Tree
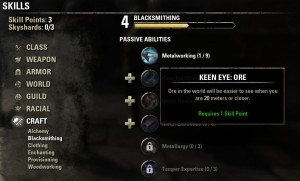
If you intend to be proficient in Blacksmithing, invest points into Metal Extraction and Metallurgy early.
You can invest a total of 24 skill points in this skill line, and if you’re serious about becoming a skilled smith you may even want to consider fully learning all of these passives.
- Metalworking (9) – Allows the use of higher level ingots.
- Keen Eye: Ore (3) – Ore in the world is easier to see when you’re nearby.
- Miner Hireling (3) – A miner hireling will sen you ore and sometimes other items every day.
- Metal Extraction (3) – Improves the chance to extract Blacksmithing ingredients from items.
- Metallurgy (3) – Reduces research times and allows researching two or three items at once.
- Temper Expertise (3) – Increases the chance to improve items with tempers.
Bare minimum you’ll need to invest in is Metalworking, otherwise you won’t be able to use ingots to craft any items but the most basic ones. It’s also the only must-have passive.
Keen Eye is very helpful but unlike herbs for Alchemy, ore is typically fairly easy to spot in the world so you may want to skip this. When you have Keen Eye all ore within 20-40 meters will “glow” making it more easier to notice, especially at night. Miner hireling is also a useful passive, but if you’re not in need of any additional materials and don’t mind gathering them yourself you can save yourself another 3 skill points here.
Metal Extraction and Temper Expertise are definitely passives you will want to max out, as is Metallurgy. Try to invest in the latter as soon as you can though: to research every possible trait even with maxed Metallurgy will take months of real time, therefore it’s best to pick it up as early as you can. Possibly fun fact, you decide: it would take 2.5 years to research all traits without Metallurgy.
Although it’s up to you to decide how many points you’re willing to spend in Blacksmithing, my advice is to at least pick up Metal Extraction and Metallurgy very early on: the former because you will be deconstructing a ton of items while leveling this profession, so getting additional materials will save you gold in the end. Don’t forget, you can always respec skill points later on!
Research
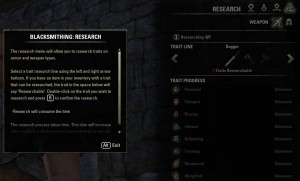
When crafting with blacksmithing you can choose to add traits to your end products: an example trait would add bonus armor or give you increased experience gained from exploration. To add a trait you will first have to research it, for which you will need an existing item with the same trait. Weapons and armor each have 8 different traits you’ll need to research, however learning a trait for one weapon or armor type will not enable you to use it on a different type.
To further clarify, if you research Sturdy trait (less decay on item when you’re killed) on a chest, you will only be able to add this trait to another chest. If you wanted to add Sturdy to head or gloves you’d need to research from that particular item slot! Same goes for weapons: if you research a trait from an axe you won’t be able to add it to daggers, maces or any other weapons.
This process takes a gigantic amount of time. Researching the first trait for one item slot takes 6 real-time hours, and it’s doubled for every additional trait you choose to research. If you want to be able to add all 8 traits to for example a chest piece, you’d have to spend 6 hours, then 12 hours, then 24 etc., totaling to nearly 64 days!
To make the most out of your smithing efforts it’s wise to first spend 3 skill points into Metallurgy to decrease the research time required, and furthermore specialize in particular traits. As an example, you could focus on first learning the most useful traits, leaving ones like decreased decay or increased exploration experience for last.
Researching traits destroys the original item in the process, so make sure you don’t research traits form any item you’re currently using!
Armor Traits
- Training – increased experience with heavy armor skill line
- Reinforced – increased armor value
- Well Fitted – reduced sprint cost
- Exploration – increased experience gained from exploration
- Divines – increased effect of Mundus stones
- Infused – improved effect of enchants
- Impenetrable – increased resistance to critical strikes
- Sturdy – chance to avoid decay when you die
Weapon Traits
- Charged – reduces weapon enchant cooldowns
- Precise – increases weapon and spell critical values
- Weighted – increased attack speed
- Sharpened – increased armor and spell penetration
- Training – increased experience gained with skill line
- Defending – increased armor and spell resistance
- Powered – reduced weapon enchant cooldowns
- Infused – increased weapon enchant effect
To learn more about how to learn traits, get trait gems and more I urge you to read our traits guide here. It will answer all of your questions.
Deconstruction
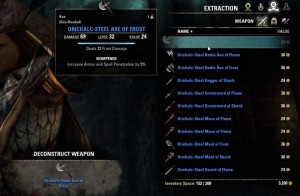 Extracting items from various weapons and armor not only gives inspiration but also materials which can be later used to craft or improve items. Deconstruction is also used to level up blacksmithing as it can give significant amounts of inspiration — more than actually creating items!
If you don’t need a particular item for research, it’s almost always better to extract it rather than sell to vendor. Vendors will give you small amounts of gold for items, but it’s far more efficient to use them as means of leveling your profession. More information about deconstruction and IP gains is provided in a section below, so patiently keep reading and we’ll get to it.
Improvement
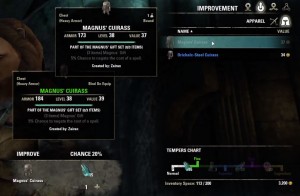 Improvement tab in the crafting interface is used to improve the rarity (quality) of your items, from white to green, green to blue, blue to purple, and finally purple to yellow. Improving items will retain and actually increase their defensive bonuses or traits. Improvements are done via Tempers, which are obtained through deconstruction, refinement or miner hirelings.
There are four different blacksmithing tempers:
- Honing Stone – improves white items into green
- Dwarven Oil – improve green items into blue
- Grain Solvent – improve quality from blue to purple
- Tempering Alloy – improve quality from purple to gold

You’ll need a total of 5 tempers to improve an item to higher quality tier with a 100% success rate: you can try to improve even with 1 temper, however your chance to improve will only be at 20% (for normal into green) and if you fail your item will be permanently destroyed! You can spend skill points in the Blacksmithing skill line to reduce the number of tempers required for improvement.
Racial Styles
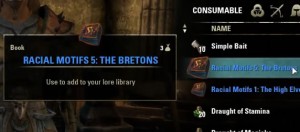 At the beginning you’ll only be able to create items in your own racial style: if you’re playing an Imperial, then only Imperial racial style is available to you. If you want to craft items in Altmer or Breton styles then you will first have to find a skill book in the world, or purchase it from other players.
To craft items in other racial motifs you will also need gemstones: special ingredients chosen when crafting items. You can get these from monster drops, deconstructing items, and very frequently from cabinets, nightstands, chests and other lootable objects. Alternatively you can purchase them from vendors for 21g a piece.
Worth noting is that racial styles only affect the item’s appearance and not its properties.
Leveling Blacksmithing
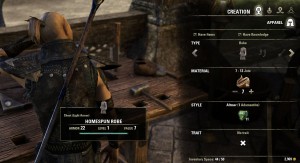 There are a few tricks to leveling Blacksmithing that new players often aren’t aware of. The biggest misconception is that creating items gives most Inspiration Points (IP) — it’s a fact that actually destroying items by deconstructing them is far more efficient when it comes to leveling. You will get the biggest IP gains by deconstructing quest rewards and monster drops, so any items you no longer use should be either deconstructed for materials and IP or used for researching traits. Research and refining ore doesn’t give any IP. Also worth noting is that deconstructing better quality weapons gives more Inspiration, so extracting a blue item will give you more IP than extracting a green one.
The second best method of obtaining Inspiration is by extracting crafted items by other players. Extracting items which you created gives roughly a third of what you’d get by extracting the very same items created by other players, so keep that in mind! Pair up with a friend or join a guild, craft items and exchange them with other players to get the most IP.
Clearly there’s a limit to how many items you can obtain for deconstruction, so inevitably you will have to craft a lot of make additional strides in IP gains. When crafting items the amount of IP you gain is determined by the item level, not by the amount of materials used, so make sure you craft items which effectively give you more IP per ingot (hint: daggers).
The most efficient way of leveling blacksmithing (outside of extracting rare and higher quality items) is definitely by pairing up with another smith and exchanging items with him. To give you an example, deconstructing your own level 6 Iron Dagger gives you 40 IP per ingot spent to craft it, while deconstructing the same level 6 Iron Dagger created by another player would yield 99 IP per ingot spent.
As you can see you gain more than double the amount of Inspiration by deconstructing items crafted by another player (or your alt). If you’re adamant about working alone though, focus on creating daggers — as mentioned IP gain is tied to item level and not the amount of ore used, and these typically use the least amount of materials.
To conclude, the most efficient IP gain per ingot ratio is by crafting a level 6 Iron Dagger (40.5 IP/ingot), followed by level 16 Steel Dagger (110 IP/ingot) once available. Whenever possible try to extract items crafted by other players rather than the ones you created yourself.
World Crafting Stations and Set Bonuses
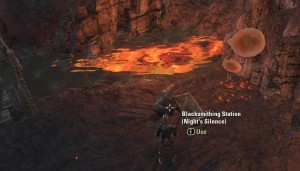
Hidden workstations can be found throughout Tamriel where crafting items also gives a particular set bonus to them, independent of traits or enchants. These set bonuses can only be obtained if you craft in these particular crafting locales, and not anywhere else. In level 5-15 (Stonefalls, Auridon, Glenumbra) zones you can find three different world crafting stations each with its own set bonus:
- Death’s Wind: when struck by a melee attack this bonus triggers an AoE knockback, once every three minutes.
- Night’s Silence: your health regeneration is increased by 40% when hidden.
- Ashen Grip: small chance to breathe extra fire damage on every melee hit.
As mentioned you can have set bonuses as well as traits and enchants on items, so if you intend to craft items you will use for awhile it’s not a bad idea to visit some of these special crafting stations.
Closing
Blacksmithing is a fun and rewarding profession, however you will have to dedicate time, gold and effort to be able to craft the very best of items. Since researching traits take a tremendous amount of time it’s best to start investing skill points in Blacksmithing early on.
For an overview of other professions in ESO see my crafting guide, or consider downloading Killerguides Strategy Guide for more in-depth tips and tricks for Blacksmithing and other crafts.

Notice: Only the first tier of upgrading gives you 20% chance each, 2nd is 15%, 3rd is 10% and 4th is 5%
Error in the “Improvement” category;
Numbers 3&4 should be opposite i.e Grain solvent = Blue to Purple and Tempering Alloy = Purple to Yellow
Indeed, fixed. I guess that’s me hoping it’d be the other way around.
No mention of the gear and weapon drops with the “intricate” trait on them in the guide? This gear can significantly increase the amount of inspiration you gain deconstructing items and is upgradeable in the same way as normal armor/weapons at crafting tables.
I didn’t think including Intricate was worth mentioning. Yes it gives higher IP when extracting, but I doubt you’d ever want to upgrade an item with that trait — even though some of the traits are fairly bad or even useless, Intricate is not useful in any way in any stage of the game.
researching does give IP, many players will notice right when they log in the IP bar for blacksmithing, clothing, or woodworking will display because during the time between starting the research / logging off, and logging back on the research time ended thus giving IP